The creation of his cloud in one hour
In the last time there was an opportunity to create your own cloud (IaaS) without effort and programming. In the simplest case, you can create a Cloud-In-A-Box using just a single computer with a processor that supports virtualization. The cloud has its limitations and, in my opinion, suitable only for training. If you have two machines with processors that support virtualization, you can create a full-fledged cloud suitable for test and development cloud solutions. The company recently Eucalyptus introduced a new version of their product Eucalyptus 3.4. Using the FastStart program you can create a full AWS and S3 compatible IaaS system without efforts and deep knowledge of the product.
I used two Intel NUC machine to install Eucalyptus. Since NUC no floppy drive, I have used CentOS 6.2 machine to create a bootable USB key. First you need to obtain FastStart ISO by going to www.eucalyptus.com/eucalyptus-cloud/get-started/try#faststart. Then create the bootable key. I used UNetbootin to create the key. Don't forget to copy the FastStart ISO on the key after work UNetbootin. On my machine UNetbootin left of file system on the key in read-only mode after work and we had to make a umount and mount key to write the file.
Before you start the installation, decide which IP you assign your machines and what you will use for virtual machines in your cloud. I decided to assign a Frontend machine 192.168.10.1, 192.168.10.2 Node Controller(NC) and use 192.168.9.1-192.168.9.100 for public addresses to the virtual machines. Make sure your network settings allow you to specify the machines static IP. If this is not possible you will have to use DHCP, which is fraught with problems if servers will get new IP after system installation. So I would recommend using static IP.
After creating the key, load the first machine with USB. First I installed Node Controller. During installation in addition to a few standard questions CentOS I had to enter server IP, netmask, Default Gateway and DNS.
After creating the NC I loaded a second machine with USB and chose Install CentOS 6 with Eucalyptus Frontend in the menu. During installation was asked a few additional questions about your network settings, and public and private addresses for the virtual machines. For public I chose the above range, and for closed proposed system 172.31.X.X range. After when the system has offered to register the NC, I pointed out the address of the first machine is 192.168.10.2. And that's all. After a reboot I got a running cloud.
To work with it can be used as a UI and command line. After installation, the system reports all the parameters for working with cloud. If you forget something just go to the Frontend machine via ssh and you will receive a reminder like this:
the
To work through UI, go to the address above
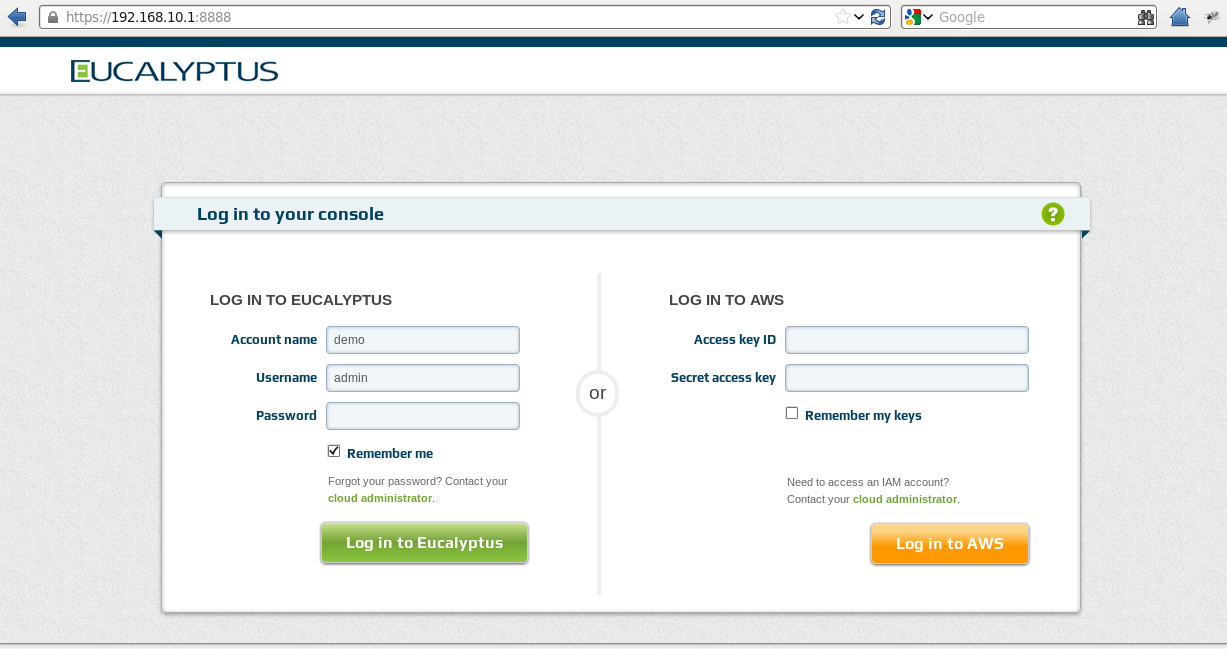
Enter your details for demo user and you can start to work. By default you have a single image on the basis of CentOS 6.4 and created several keys. So that you can immediately start the virtual machine.

To work with the command line open ssh on Frontend the machine. And load the environment variables for one of the default users. For example:
the
Then you can start to use the command line to operate the system. For example, to display all the system resources available for running virtual machines:
the
On my NC, the car is a 4-core processor and a 128 GB disk. By default, after installation, I could run up to 4 virtual machines. But as you can see, the system offers to run up to 8 virtual machines. To accomplish this go to ssh on the NC machine and edit some variables in /etc/eucalyptus/eucalyptus.conf file. I put:
the
After this you should restart NC process /etc/init.d/eucalyptus-nc restart and my order was two more resources. I would not abuse the change of the number of processors, but to double them, I think it's safe if VM will not use 100% of his CPU.
If you are accustomed to use Russian interface in the UI, then you can change the language settings UI. To do this, click on ssh on Frontend the machine and edit /etc/eucalyptus-console/console.ini file. It is necessary to change the locale
Then restart eucalyptus-console process /etc/init.d/eucalyptus-console restart
Going again in the UI you will see that the menu and many of the messages translated into Russian language.

The whole installation of the two machines and settings, I spent less than an hour.
Article based on information from habrahabr.ru
I used two Intel NUC machine to install Eucalyptus. Since NUC no floppy drive, I have used CentOS 6.2 machine to create a bootable USB key. First you need to obtain FastStart ISO by going to www.eucalyptus.com/eucalyptus-cloud/get-started/try#faststart. Then create the bootable key. I used UNetbootin to create the key. Don't forget to copy the FastStart ISO on the key after work UNetbootin. On my machine UNetbootin left of file system on the key in read-only mode after work and we had to make a umount and mount key to write the file.
Before you start the installation, decide which IP you assign your machines and what you will use for virtual machines in your cloud. I decided to assign a Frontend machine 192.168.10.1, 192.168.10.2 Node Controller(NC) and use 192.168.9.1-192.168.9.100 for public addresses to the virtual machines. Make sure your network settings allow you to specify the machines static IP. If this is not possible you will have to use DHCP, which is fraught with problems if servers will get new IP after system installation. So I would recommend using static IP.
After creating the key, load the first machine with USB. First I installed Node Controller. During installation in addition to a few standard questions CentOS I had to enter server IP, netmask, Default Gateway and DNS.
After creating the NC I loaded a second machine with USB and chose Install CentOS 6 with Eucalyptus Frontend in the menu. During installation was asked a few additional questions about your network settings, and public and private addresses for the virtual machines. For public I chose the above range, and for closed proposed system 172.31.X.X range. After when the system has offered to register the NC, I pointed out the address of the first machine is 192.168.10.2. And that's all. After a reboot I got a running cloud.
To work with it can be used as a UI and command line. After installation, the system reports all the parameters for working with cloud. If you forget something just go to the Frontend machine via ssh and you will receive a reminder like this:
the
[John@localhost ~]$ ssh root@192.168.10.1
root@192.168.10.1's password:
Last login: Wed Oct 30 14:45:12 2013 from 192.168.1.183
The User Console URL (for managing instances, volumes, etc.):
https://192.168.10.1:8888/

User Credentials:
* Account: demo
* Username: admin
* Password: password

Admin Console URL (for managing user accounts, VM types, etc.):
https://192.168.10.1:8443

Admin Credentials:
* Account: eucalyptus
* Username: admin
* Password: admin
To work through UI, go to the address above
https://192.168.10.1:8888/
Enter your details for demo user and you can start to work. By default you have a single image on the basis of CentOS 6.4 and created several keys. So that you can immediately start the virtual machine.
To work with the command line open ssh on Frontend the machine. And load the environment variables for one of the default users. For example:
the
. ~/credentials/admin/eucarc
Then you can start to use the command line to operate the system. For example, to display all the system resources available for running virtual machines:
the
[root@Box1 ~]# euca-describe-availability-zones verbose
AVAILABILITYZONE CLUSTER01 192.168.10.1 arn:euca:eucalyptus:CLUSTER01:cluster:cc_01/
AVAILABILITYZONE |- vm types free / max cpu ram disk
AVAILABILITYZONE |- m1.small 0005 / 0008 1 256 5
AVAILABILITYZONE |- t1.micro 0005 / 0008 1 256 5
AVAILABILITYZONE |- m1.medium 0005 / 0006 1 512 10
AVAILABILITYZONE |- c1.medium 0002 / 0004 2 512 10
AVAILABILITYZONE |- m1.large 0002 / 0004 2 512 10
AVAILABILITYZONE |- m1.xlarge 0002 / 0004 2 1024 10
AVAILABILITYZONE |- c1.xlarge 0002 / 0004 2 2048 10
AVAILABILITYZONE |- m2.xlarge 0002 / 0004 2 2048 10
AVAILABILITYZONE |- m3.xlarge 0001 / 0002 4 2048 15
AVAILABILITYZONE |- m2.2xlarge 0001 / 0002 2 4096 30
AVAILABILITYZONE |- m3.2xlarge 0001 / 0002 4 4096 30
AVAILABILITYZONE |- cc1.4xlarge 0000 / 0001 8 3072 60
AVAILABILITYZONE |- m2.4xlarge 0000 / 0001 8 4096 60
AVAILABILITYZONE |- hi1.4xlarge 0000 / 0000 8 6144 120
AVAILABILITYZONE |- cc2.8xlarge 0000 / 0000 16 6144 120
AVAILABILITYZONE |- cg1.4xlarge 0000 / 0000 16 12288 200
AVAILABILITYZONE |- cr1.8xlarge 0000 / 0000 16 16384 240
AVAILABILITYZONE |- hs1.8xlarge 0000 / 0000 48 119808 24000
On my NC, the car is a 4-core processor and a 128 GB disk. By default, after installation, I could run up to 4 virtual machines. But as you can see, the system offers to run up to 8 virtual machines. To accomplish this go to ssh on the NC machine and edit some variables in /etc/eucalyptus/eucalyptus.conf file. I put:
the
MAX_CORES="8"
NC_WORK_SIZE=70000
After this you should restart NC process /etc/init.d/eucalyptus-nc restart and my order was two more resources. I would not abuse the change of the number of processors, but to double them, I think it's safe if VM will not use 100% of his CPU.
If you are accustomed to use Russian interface in the UI, then you can change the language settings UI. To do this, click on ssh on Frontend the machine and edit /etc/eucalyptus-console/console.ini file. It is necessary to change the locale
language=en_usThen restart eucalyptus-console process /etc/init.d/eucalyptus-console restart
Going again in the UI you will see that the menu and many of the messages translated into Russian language.
The whole installation of the two machines and settings, I spent less than an hour.


Комментарии
Отправить комментарий